
TensorFlow Image Classifier
Let's train an image classifier using Tensorflow and deploy it in the Qwak platform.
First, we will need to create an empty Qwak project using the qwak models init command. If you are not familiar with it, see Getting Started with Qwak.
Defining dependencies
After creating the empty project, we specify the dependencies. In this tutorial, we will use pip. We remove the default conda.yml file and create the requirements.txt file. In the requirements.txt file, we put the following dependencies:
pandas
tensorflow
keras
imageio==2.9.0
numpyNote
We use 3.9.7. If you want a different Python version, you have to use conda or poetry dependency management.
Training your model
We will train the model using the Fashion-MNIST dataset. We will also log the model parameters and the evaluation metrics in the process. We will see them later in Qwak UI.
We will also use the ImageInputAdapter to send the images directly to the endpoint without converting them into arrays of numbers in the client that uses the model.
First, we have to define the imports:
import pandas as pd
import numpy as np
import qwak
import tensorflow as tf
from qwak.model.base import QwakModel
from qwak.model.experiment_tracking import log_metric, log_param
from qwak.model.adapters import ImageInputAdapter
Now, we can start implementing the build function.
Let's download the dataset and preprocess the data:
fashion_mnist = tf.keras.datasets.fashion_mnist
(train_images, train_labels), (test_images, test_labels) = fashion_mnist.load_data()

train_images = train_images / 255.0
test_images = test_images / 255.0
We must define the parameters of the hidden layer used in the model. We will also log them to track the experiment parameters:
layer_size = 128
activation_function = 'relu'

log_param({'layer_size': layer_size, 'activation_function': activation_function})
We have everything we need to train the model, so let's start training it:
model = tf.keras.Sequential([
    tf.keras.layers.Flatten(input_shape=(28, 28)),
    tf.keras.layers.Dense(layer_size, activation=activation_function),
    tf.keras.layers.Dense(10)
])

model.compile(
    optimizer='adam',
    loss=tf.keras.losses.SparseCategoricalCrossentropy(from_logits=True),
    metrics=['accuracy']
)

model.fit(train_images, train_labels, epochs=10)
After training, we will use the test set to evaluate the model's performance, and we will log the evaluation metric in the Qwak platform:
test_loss, test_acc = model.evaluate(test_images,  test_labels, verbose=2)

log_metric({'test_acc': test_acc, 'test_loss': test_loss})
We want to replace the model output with probabilities, so we should add one more layer to the trained model:
model = tf.keras.Sequential([model, tf.keras.layers.Softmax()])Finally, we have to serialize the model to make it available during the inference. Qwak automatically serializes all fields of your QwakModel implementation. Therefore, it is sufficient to store the model in the model field:
self.probability_model = modelUsing model inference
To use the model, we must implement the predict function. However, in this case, we want to send the entire image to the model, not individual features of the input layer. Our model will convert the image into those features automatically.
To do so, we have to define an input adapter for the predict function:
@qwak.api(analytics=False, input_adapter=ImageInputAdapter())
    def predict(self, input_data) -> pd.DataFrame:
In the predict function, we have access to the array of pixel values.
We trained the model using grayscale images, so we must convert every input image to grayscale.
Let's define a helper function first:
def rgb2gray(rgb):
   return np.dot(rgb[...,:3], [0.2989, 0.5870, 0.1140])
Now, we can loop over the input images (or you can use the map function to apply the transformations to all pictures of the input array):
result = []

for image in input_data:
    gray = rgb2gray(image)
    gray = gray / 255.0

    prediction_input = (np.expand_dims(gray, 0))
    prediction = self.probability_model.predict(prediction_input)
    result.append(prediction[0])

return pd.DataFrame(result)
Deploying your model
In this tutorial, we will show how to get a prediction from the model using curl.
First, we must get an access token from the authentication service:
curl --location ‘https://grpc.qwak.ai/api/v1/authentication/qwak-api-key’\
--request POST \
--header ‘Content-Type: application/json’\
--data ‘{“qwakApiKey”: “YOUR_API_KEY”}’
In the response, we receive the authentication token valid for 24 hours. We will include the token in every subsequent API call.
To access the model using REST API, we need two information: the name of the Qwak environment running the model and the model name. When we have it, we can build the URL like this:
https://models.ENVIRONMENT_NAME.qwak.ai/v1/MODEL_NAME/predictNow, we can send the image to the model:
curl -v --location https://models.ENVIRONMENT_NAME.qwak.ai/v1/MODEL_NAME/predict \
--request POST \
--header 'Content-Type: image/jpeg' \
--data-binary @fashion_mnist_28_28.jpg \
--header 'Authorization: Bearer ACCESS_TOKEN
Our model returns an entire array of values indicating the category of the item in the picture:
[{“0”:0.0,“1":0.0,“2”:1.0,“3":0.0,“4”:0.0,“5":0.0,“6”:0.0,“7":0.0,“8”:0.0,“9":0.0}]Of course, we could modify the predict function to get a category name instead. You can use it to run any post-processing code that makes sense in your use case.
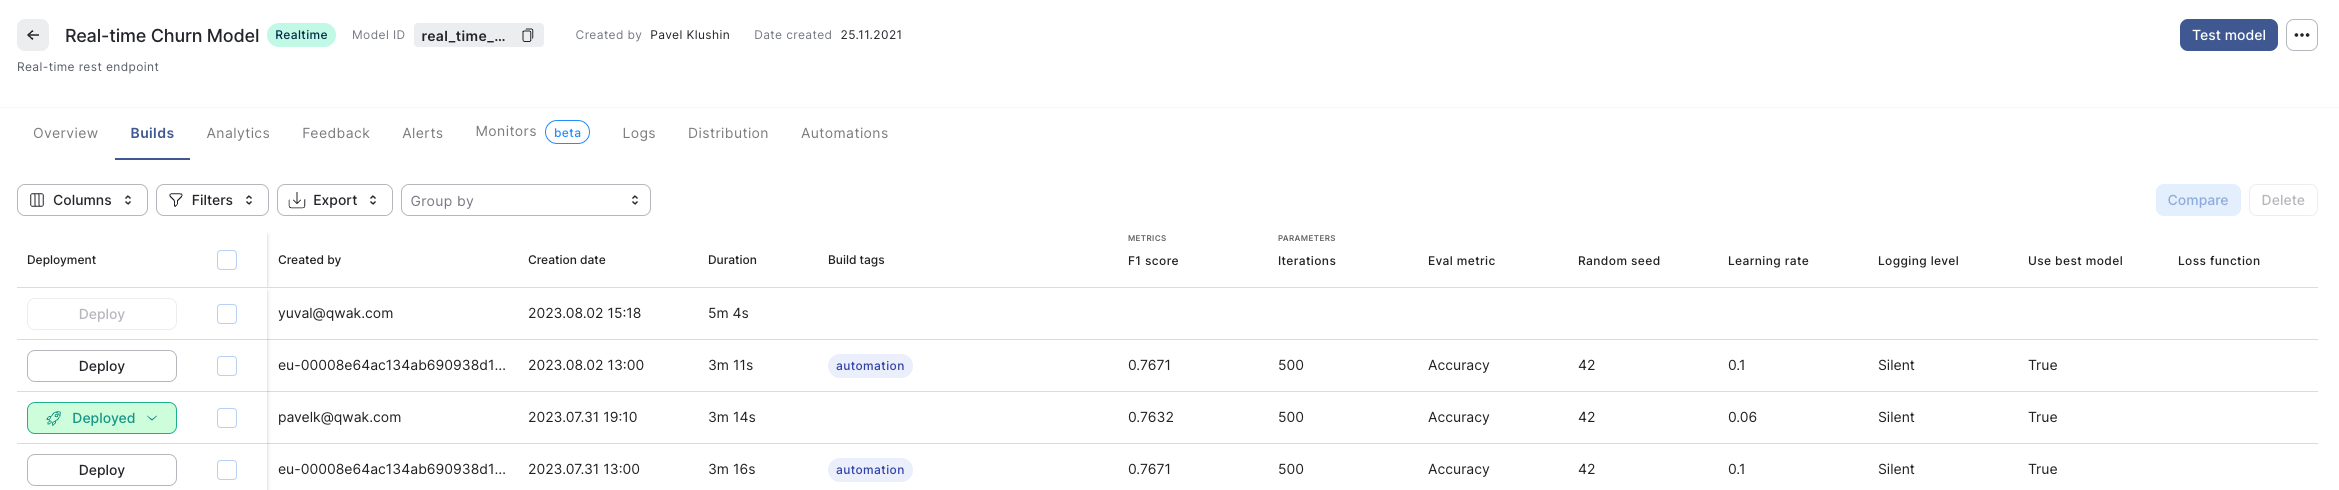
Experiment tracking on Qwak
As we logged the model parameters and the evaluation metrics, we can see them in the model builds table
Updated 4 months ago