Secret Management
Secrets store sensitive data such as passwords, tokens, or keys.
Managing credentials
Securely managing sensitive data and credentials in complex data projects is crucial.
Use secrets to avoid confidential information in model deployments and data source connections.
In traditional approaches, using credentials in an ML build involved including them in the Python code or using environment variables. Both options pose significant security risks.
Using the JFrog ML Secret Service, you can easily and securely store your credentials and pass them to your Python code with full confidentiality.
Secret naming conventionsSecret names must adhere to the valid DNS format, which entails being all lowercase, comprising a minimum of 3 characters, and up to 100 characters in length. Hyphens are allowed (
-), however using underscores (_) is not.
Creating secrets via UI
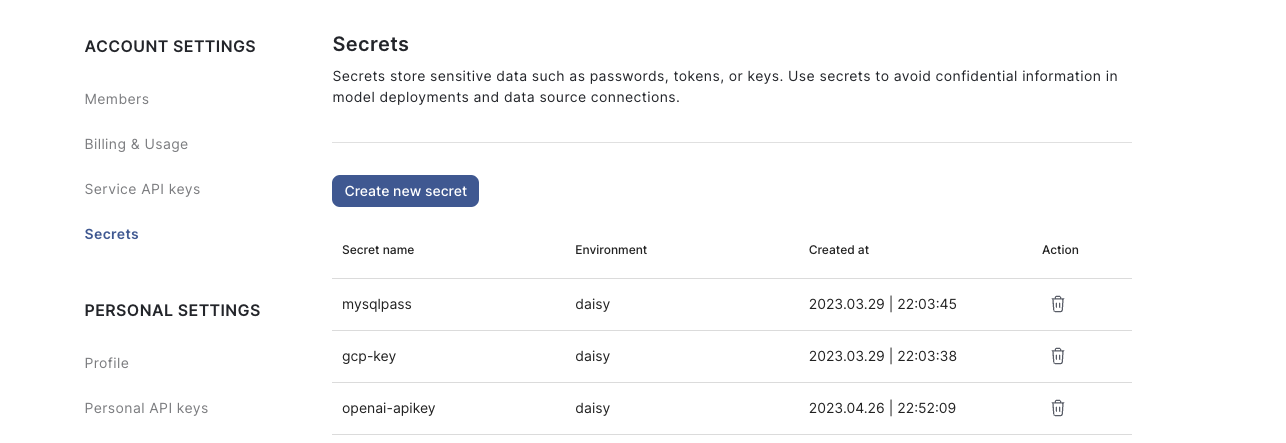
Create secrets via the UI by visiting the Account Settings → Secrets to view, create or delete credentials.

Access secrets from account settings
Creating secrets via CLI
Secret names may be up to 36 characters, may contain letters, numbers and dash ("-"), and must start with a letter.
Create secrets via the JFrog ML CLI with the following commands:
qwak secrets set --name <aws-api-key> --value <the_value_of_the_key>
qwak secrets set --name <aws-api-secret> --value <the_value_of_the_secret>
Model build credentials
You may need the credentials during a build process. For example, retrieving a pre-trained model or data that was not stored in JFrog ML Feature Store. To retrieve the credentials, import the SecretServiceClient and use it to retrieve the secret:
from qwak import QwakModel
from qwak.clients.secret_service import SecretServiceClient

class TestModel(QwakModel)
	# ...

  def build():
      secret_service = SecretServiceClient()
      aws_api_key = secret_service.get_secret('aws-api-key')
aws_secret_key = secret_service.get_secret('aws-secret-key')Avoid printing or logging secret values as the model
stdoutis visible on the build logs.
Feature store credentials
JFrog ML Feature Store integrates with the Secret Service to enable secure access to data sources. Use your secrets in the data source definition to ensure secure authorized access.
Connecting to Snowflake
- Create new secrets with the user name and password.
qwak secrets set --name snowflake_user --value <snowflake_user>
qwak secrets set --name snowflake_password --value <secured_password_1234>- Define a Snowflake data source using the secret names:
from qwak.feature_store.data_sources import SnowflakeSource

# The secret name stored in the Secret Service
QWAK_SECRET_SNOWFLAKE_USER = '<qwak-secret-snowflake-user>'
QWAK_SECRET_SNOWFLAKE_PASSWORD = '<qwak-secret-snowflake-password>'

# Snowflake table details
DATABASE='<snowflake_db_name>'
SCHEMA='<snowflake_schema_name>'
WAREHOUSE='snowflake_data_warehouse_name'
HOST='<SnowflakeAddress/DNS:port>'

snowflake_source = SnowflakeSource(
    name='my-snowflake-datasource',
    description='An example snowflake data source',
    date_created_column='DATE_COLUMN',
    username_secret_name=QWAK_SECRET_SNOWFLAKE_USER,
    password_secret_name=QWAK_SECRET_SNOWFLAKE_PASSWORD,
    host=HOST,
    database=DATABASE,
    schema=SCHEMA,
    warehouse=WAREHOUSE
)
Updated 7 months ago