
Installation
Configure JFrog ML for seamless integration with your existing JFrog platform.
Setting Up JFrog ML
To get started, click on the JFrog ML link in the left sidebar of your JFrog platform. This will open a new tab with the JFrog ML setup form.
Note: Only a Platform Admin can perform the initial setup.
During setup, you'll need to select:
- A JFrog Project where JFrog ML will store generated artifacts, such as Docker images and files.
- A Cloud Provider (currently AWS & GCP; Azure support coming soon).
- A Cloud Region for deployment.
Once you click Get Started, JFrog ML will be enabled and seamlessly integrated with your platform.

Installing Qwak SDK
The Qwak SDK is your gateway to building and deploying models and features on JFrog ML, seamlessly integrating with your existing JFrog platform.
Installation Notes
qwak-sdksupports Python versions 3.9 to 3.11. Please install it using a compatible Python version.- Before configuring the
qwak-sdkmake sure you've set-up your JFrog ML environment.
Installation
- Create a new virtual environment using your preferred Python framework, such as virtualenv, poetry or conda.
- Install the Qwak SDK in your virtual environment with the following command to install the Qwak SDK and CLI client, which you'll use to interact with the JFrog ML platform.
- Mac clients do not need to install Rosetta, the SDK is compatible with M1 processors.
pip install qwak-sdkpoetry add qwak-sdk
JFrog CLIWe recommend to install the JFrog CLI tool before authenticating using the
qwak-sdk. This will give you more options to manage authentication and login to your JFrog platform.
Configuring Qwak SDK
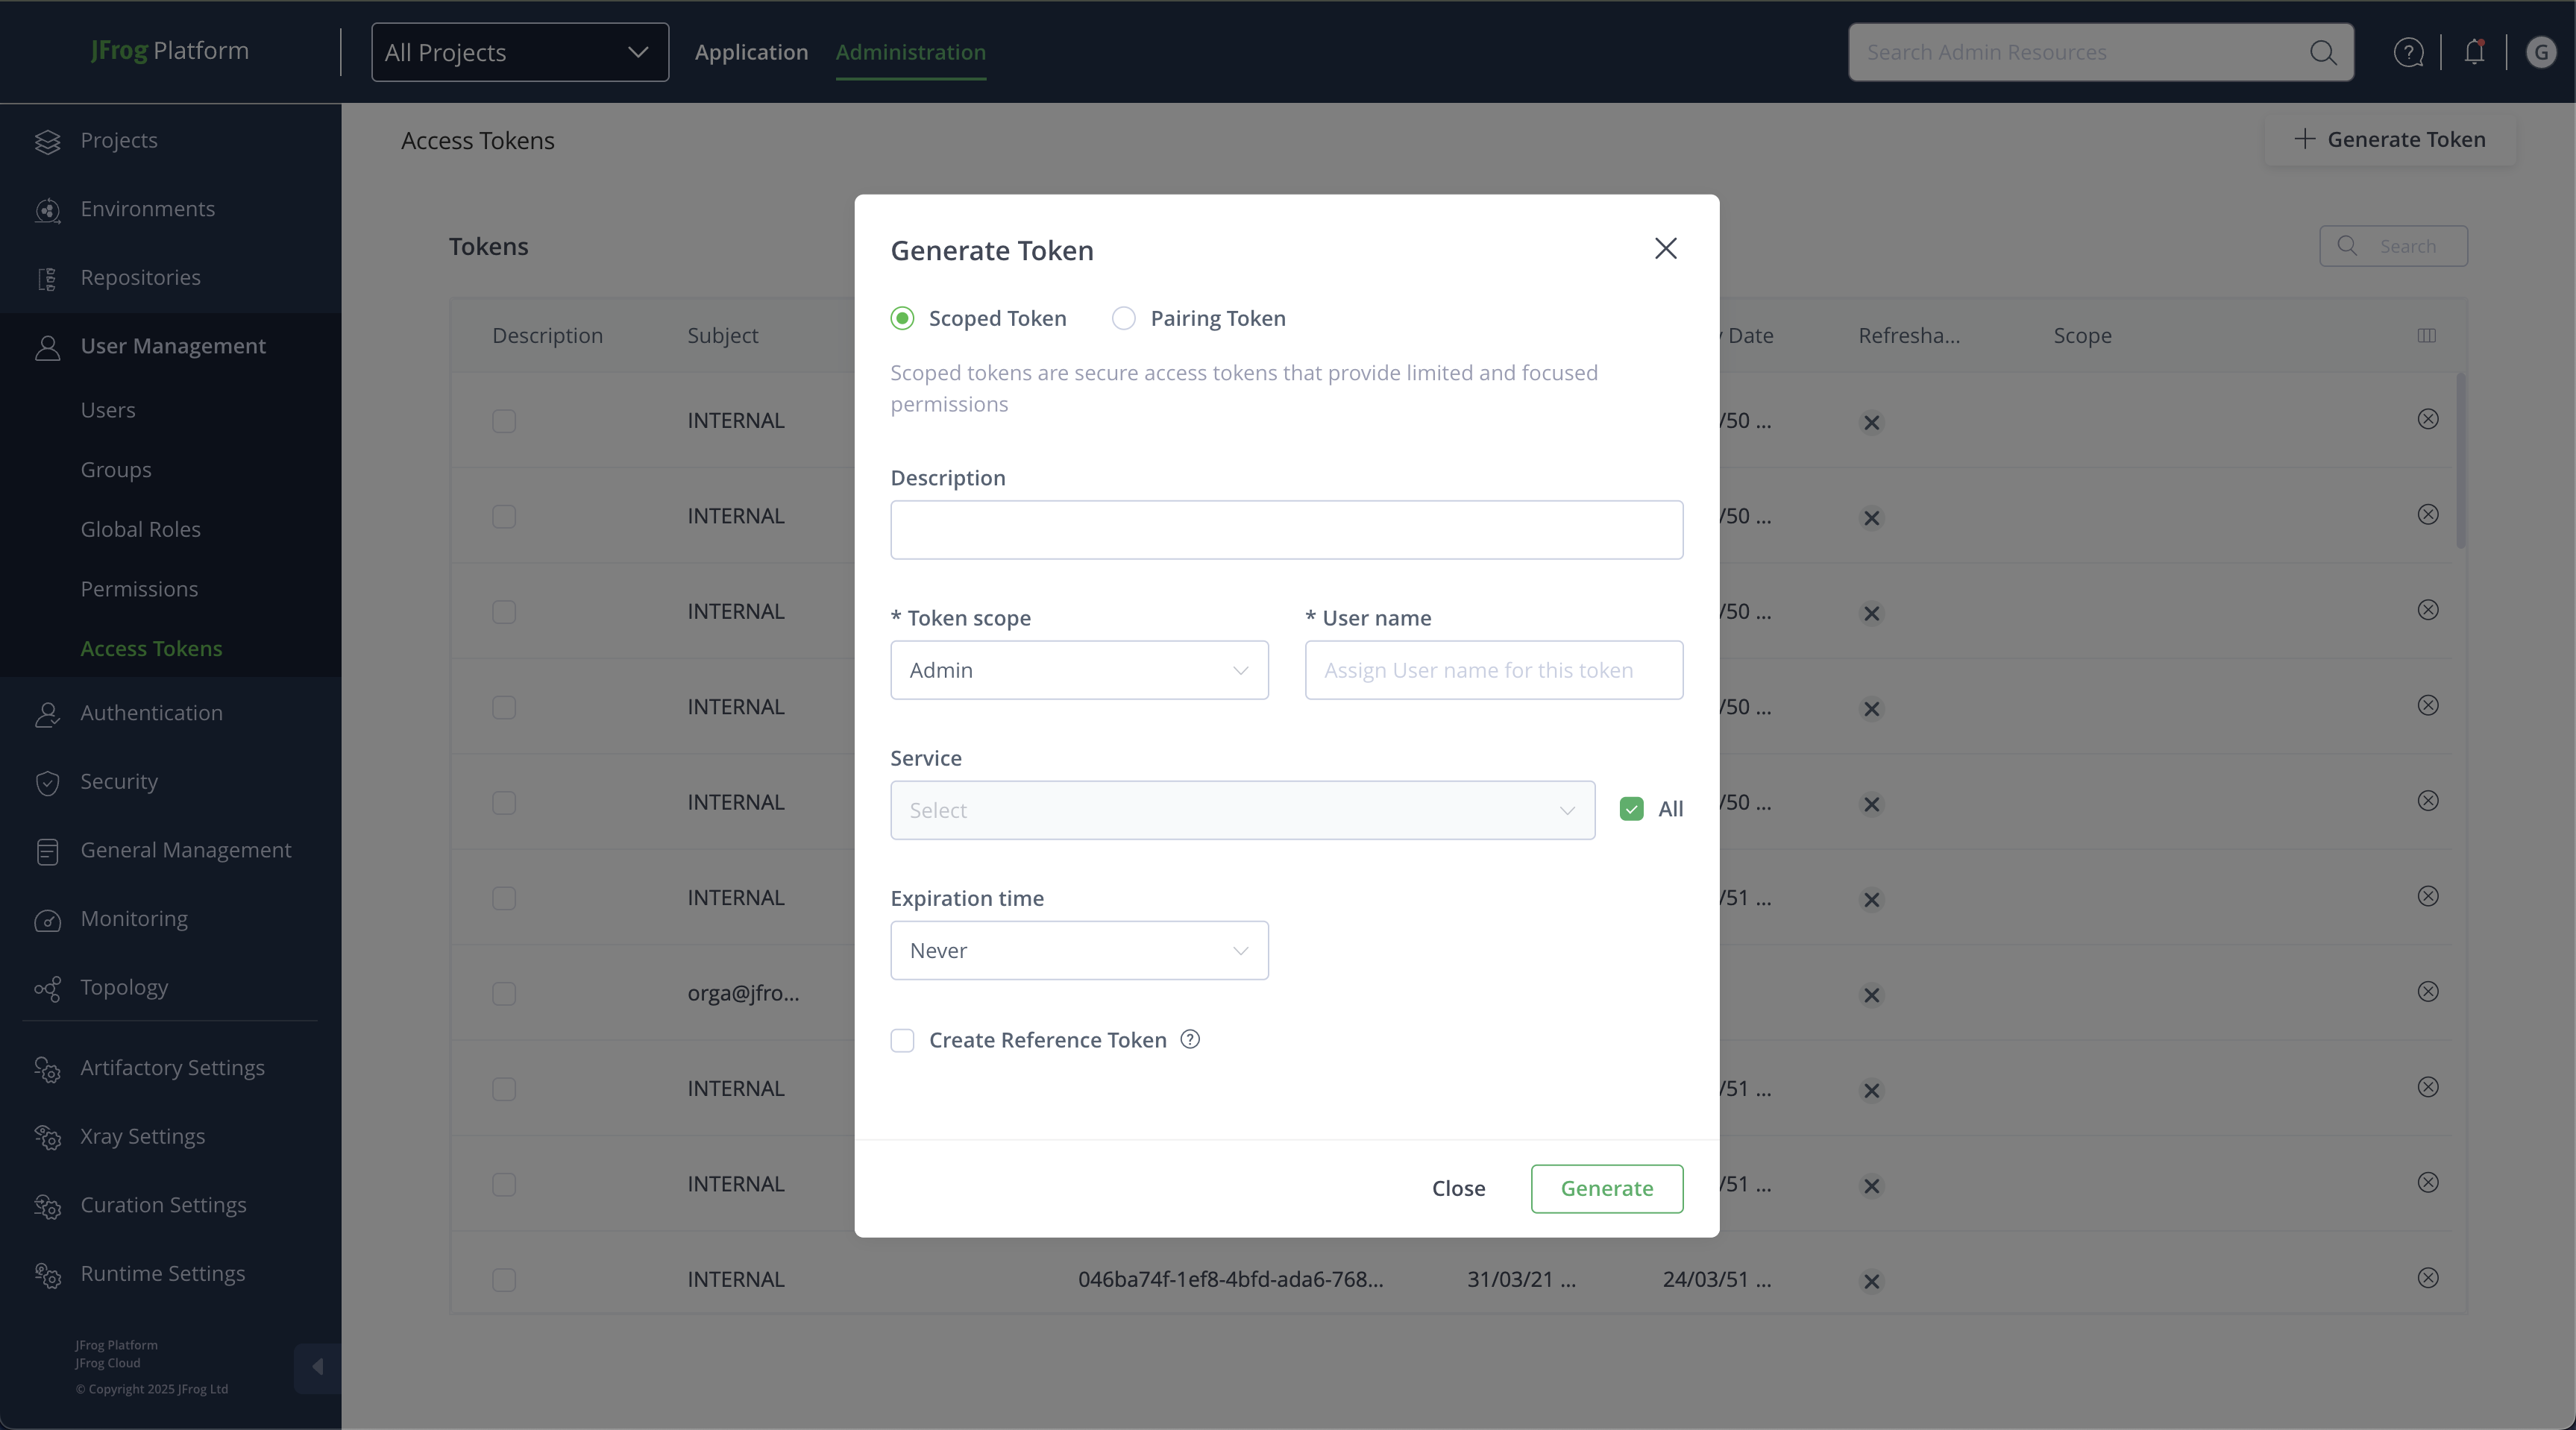
Configuring your authentication is through an access token, which your need to retried from the JFrog platform under: Administration -> User Management -> Access Token.
Generate a token for the required user that will serve you in authenticating with the platform
1. Configuring Via CLI
Open the terminal and type in the following command, replacing the variables.
qwak configure --type jfrog --url <PLATFORM_BASE_URL> --token <ACCESS_TOKEN>For example:
qwak configure --type jfrog --url https://mydemo.jfrog.io --token "ABCDEF123456"When configured correctly, you'll receive the below message
Logged in successfully to: <PLATFORM_BASE_URL>2. Configuring Via Environment Variable
JFrog ML also allows you to configure your session authentication key via environment variables. Please note that this is only relevant for the individual Terminal session or until the next computer restart.
To set the environment variable, use the following command:
export JF_URL=<PLATFORM_BASE_URL>
export JF_ACCESS_TOKEN=<ACCESS_TOKEN>
The same behavior occurs when you're running Python code that calls the Qwak SDK; it will read the environment variable for authentication.
Troubleshooting
Unrecognized qwak Command
qwak CommandIf your local system fails to recognize the qwak command, ensure it's added to your system's PATH environment variable.
Read/Write Permission Issues
Should you face issues related to read/write permissions with the following error message:
Could not read user configuration from <home_path>/.qwak/config. Please make sure one has been set using qwak configure command.Manually create the .qwak directory in your home path and rerun the configure command:
mkdir -p <home_path>/.qwakAdditional Troubleshooting
_For any other issues with installing and configuring your Qwak SDK please refer to Installation Issues or Performance Issues pages.
Updated about 2 months ago