
Features in Inference
This tutorial shows how to access data stored in the JFrog ML Feature Store online store during the inference.
Using OnlineClient
OnlineClientIn the predict function, we create an instance of the OnlineClient.
After that, we create a ModelSchema containing all of the features we want to retrieve.
We create a DataFrame containing the entities identifiers and pass it to the Feature Store. As a response, we get a Pandas DataFrame with the requested features.
import pandas as pd
from qwak.feature_store.online.client import OnlineClient
from qwak.model.schema_entities import FeatureStoreInput
from qwak.model.schema import ModelSchema

model_schema = ModelSchema(
    inputs=[
        FeatureStoreInput(name='user-credit-risk-features.checking_account'),
        FeatureStoreInput(name='user-credit-risk-features.age'),
        FeatureStoreInput(name='user-credit-risk-features.job'),
        FeatureStoreInput(name='user-credit-risk-features.duration'),
        FeatureStoreInput(name='user-credit-risk-features.credit_amount'),
        FeatureStoreInput(name='user-credit-risk-features.housing'),
        FeatureStoreInput(name='user-credit-risk-features.purpose'),
        FeatureStoreInput(name='user-credit-risk-features.saving_account'),
        FeatureStoreInput(name='user-credit-risk-features.sex'),
        FeatureStoreInput(name='liked-posts.count')
    ])

online_client = OnlineClient()

df = pd.DataFrame(columns=[               'user',               		 'post_id'],
                  data   =[['06cc255a-aa07-4ec9-ac69-b896ccf05322',   '1234'],
                           ['asdc255a-aa07-4ec9-ac69-b896c1231445',   '7889']])

user_features = online_client.get_feature_values(model_schema, df)

print(user_features)
Using the qwak.api() Decorator
qwak.api() DecoratorAlternatively, we could use the features_extraction parameter and get the features automatically extracted when the Entity is being sent in your prediction input Dataframe . As with the OnlineClient, the ModelSchema is required to define what features are to be extracted from the Online Store.
import qwak

@qwak.api(feature_extraction=True)
def predict(self, df, extracted_df):

    # Add prediction logic here

    return output_dataframe
In the predict function, use the qwak.api()decorator with the parameter feature_extraction=True as in the code example above.
The df Dataframe will contain your inference call inputs and the extracted_df Dataframe will contain the latest feature vectors from the Online store for the queried entities.
Using the REST API
The JFrog ML Online Store can also be queried via REST calls as shown in the example below:
Generate a JFrog ML Token for Authentication
Use the following command to obtain a token, valid for 24 hours:
curl --request POST 'https://grpc.qwak.ai/api/v1/authentication/qwak-api-key' \
     --header 'Content-Type: application/json' \
     --data '{"qwakApiKey": "<QWAK_API_KEY>"}'
Optionally, store the token in an environment variable:
export QWAK_TOKEN="<OUTPUT_FROM_AUTHENTICATION_CURL_CALL>"Retrieve Online Features
With the fresh JFrog ML token, use the following command to extract features:
curl --location 'https://grpc.<YOUR-ACCOUNT>.qwak.ai/api/v1/rest-serving/multiFeatureValues/' \
--header 'Authorization: Bearer '$QWAK_TOKEN'' \
--header 'Content-Type: application/json' \
--data '{
"entitiesToFeatures": [{
"features": [{
"batchV1Feature": {
"name": "user-credit-risk-features.checking_account"
}
}, {
"batchV1Feature": {
"name": "user-credit-risk-features.age"
}
}],
"entityName": "user"
}],
"entityValuesMatrix": {
"header": {
"entityNames": ["user"]
},
"rows": [{
"entityValues": ["45b7836f-bf7c-4039-bc9e-d33982cc1fc5"]
}]
}
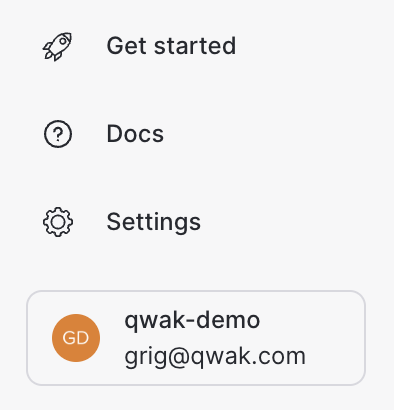
}'Finding Your JFrog ML Account Name: Your JFrog ML account name is readily available in the UI. You can find it at the bottom left corner of the interface. For clarity, refer to the screenshot below. In this example, the account name is qwak-demo which will be replaced in the REST URL above.
When referencing feature sets in SDK or REST calls, use hyphens
-instead of underscores_. This is a common notation in the JFrog ML platform to ensure consistency and avoid errors during calls.
If you're on a SaaS account, use
batchV1Featureas suggested in the example above.
For Hybrid accounts, switch to usingbatchFeaturein the REST data JSON payload.
Example JSON Response:
{
  "featureValues": "{\"index\":[0],\"data\":[[\"moderate\",27]],\"columns\":[\"user-credit-risk-features.checking_account\",\"user-credit-risk-features.age\"]}"
}
These examples are using curl for REST calls but any other REST client will work just as well.
Updated 7 months ago